Step by Step Tutorial

Heat Press Instructions for DTF Transfers with care & wash guide.

Settings for TWZ DTF transfers

Pro tips: Actual settings may vary due to environmental conditions and equipment being used. Temperature and humidity do affect results, along with proper working equipment. Work areas with excessive humidity will require longer pre-press times to release moisture from the substrate. You will need to adjust these settings slightly to match your equipment and conditions. These settings are here to get you started.

  • 100% Cotton

    1. Moisture release pre-press at 325°F for 7-13 seconds
    2. Start at 325°F for 15 seconds for first press and adjust as necessary
    3. Second press/ finishing press @ 325°F for 3-7 seconds use you're preferred finishing sheet type
    4. Peel when transfer is cold to touch
  • Polyester blend

    1. Moisture release pre-press 270-290°F for 7-13 seconds
    2. Start around 270-290°F for 15 seconds for first press and adjust as necessary
    3. Second press/ finishing press @ 325°F for 3-7 seconds use you're preferred finishing sheet type
    4. Peel when transfer is cold to touch
  • COLD & HOT PEEL PRESSURE SETTINGS

    Cold peel film: pressed with medium to heavy pressure. 30-60 psi if using pneumatic. Tip: Different pressures will result in different finishes. Not enough pressure with result in a transfer to not adhere properly. While just above not enough pressure will result in a smooth finish. Heavier pressure will result in a transfer that's pressed deeper into the substrate leaving a textured finish. Ideally set the pressure to let the t-shirt texture show through the transfer and then back the pressure off a bit until texture barley shows this is the sweet spot.

  • 100% Cotton

    1. Moisture release pre-press at 235-260°F for 7-13 seconds
    2. Start at 235-260°F for 15 seconds for first press and adjust as necessary
    3. Second press/ finishing press @ 235-260°F for 5-7 seconds use you're preferred finishing sheet type
    4. Peel right away (keep fingers down on surface while peeling in one quick swift motion.)
  • Polyester blend

    1. Moisture release pre-press 230-260°F for 7-13 seconds
    2. Start around 230-260°F for 15 seconds for first press and adjust as necessary
    3. Second press/ finishing press @ 230-260°F for 5-7 seconds use you're preferred finishing sheet type
    4. Peel right away (keep fingers down on surface while peeling in one quick swift motion.)
  • COLD & HOT PEEL PRESSURE SETTINGS

    Cold peel film: pressed with medium to heavy pressure. 30-60 psi if using pneumatic. Tip: Different pressures will result in different finishes. Not enough pressure with result in a transfer to not adhere properly. While just above not enough pressure will result in a smooth finish. Heavier pressure will result in a transfer that's pressed deeper into the substrate leaving a textured finish. Ideally set the pressure to let the t-shirt texture show through the transfer and then back the pressure off a bit until texture barley shows this is the sweet spot.

  • final-press sheet materials to be tested:

    Teflon sheet

    brown craft paper

    T-seal

    Parchment paper

    Canvas

    Unused DTF film (matte side of film face down)

  • 100% Cotton

    320-350°F (160-180°C) 10-15 Seconds

    Medium to Heavy pressure

  • Cotton/ Polyester

    320-350°F (160-180°C) 10-15 Seconds Medium to Heavy pressure

  • Polyester

    300-325°F 10-15 Seconds Medium to Heavy pressure

  • Synthetic/ Polyester

    280-300°F (140-150°C) 10-15 Seconds Medium to Heavy pressure

  • Lycra & Nylon

    260°F

*Above is the industry standards temperature and pressure settings for reference only.

Pro Tip: Every heat press is unique, so you might need to tweak the temperature settings based on your machine’s specific output readings. It’s a great idea to use a temperature testing device, like an infrared heat gun, to check how accurate your heating plate is. Be sure to test all areas of the heat plate to ensure your heat press is delivering even warmth across the whole surface.

Step:1 Check transfer quality

  • First, unbox your transfers.
  • Inspect and cut out your transfers. A quality transfer should have an orange peel-like surface evenly spread and without defects from shipping. If any damage happened during shipping please notify us right away.
  • Cut away the color bar. In the process of printing, a color bar is printed alongside the transfer to ensure quality. Simply cut off the color bar and discard it. Do not leave the color bar on the transfer when pressing. The color bar will adhere to the substrate and will not be fixable afterward.
  • Finally, place them aside to be ready for pressing but keep them clean and organized.

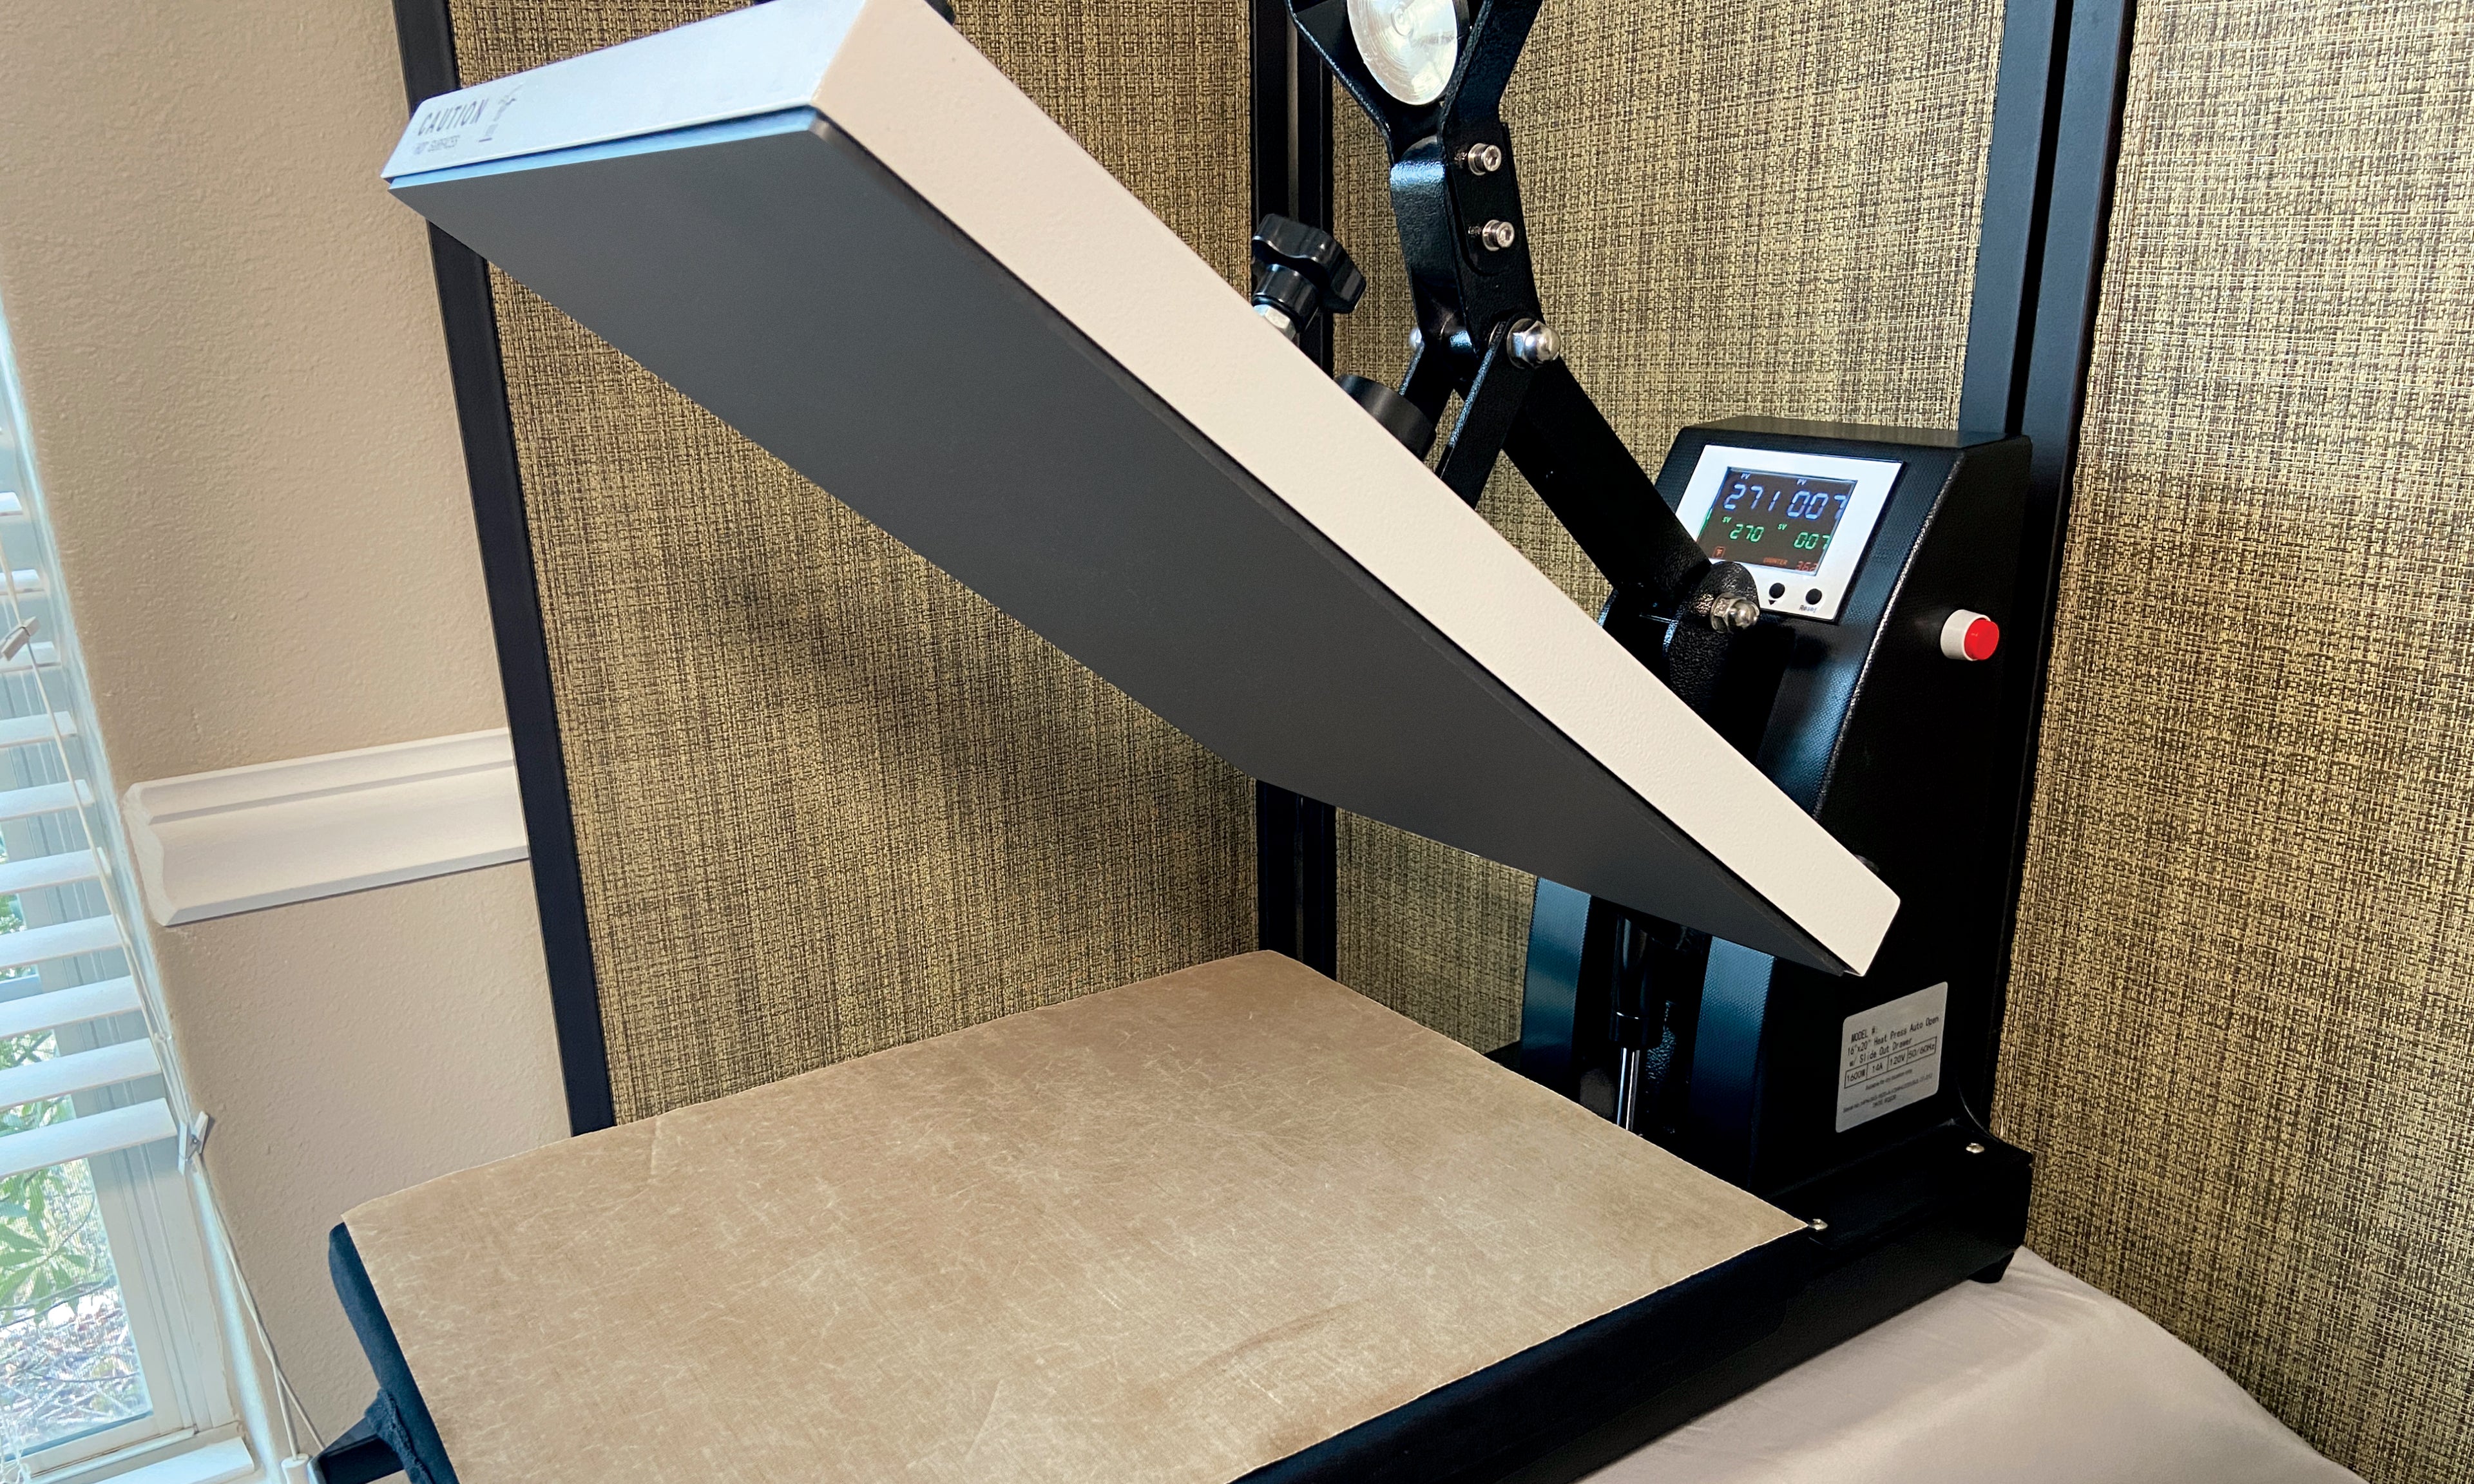
Step 2: Turn on press & set recommended temperature

  • Turn on your heat press & set the recommended temperature to material being used. Refer to recommended settings above.
  • Wait & allow heat press to get to the selected temperature.

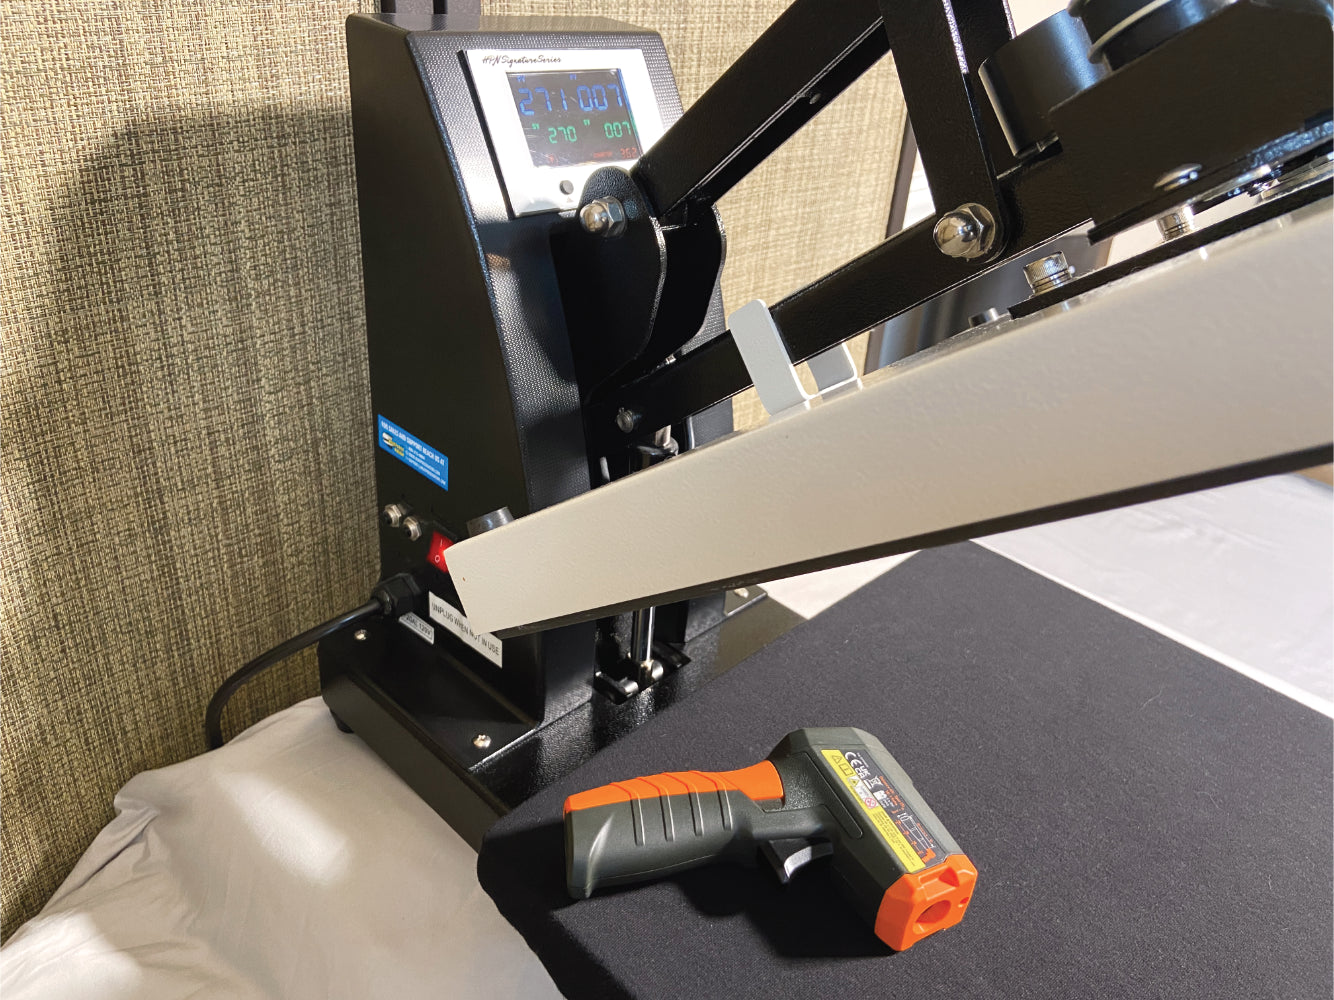
Pro tips: Check the heat plate on the press with an infrared heat sensor gun for proper operation of the heat press. You're heat presses screen may display non accurate temperatures.

Step 3: While waiting for the press to come up to temperature prepare the Print Surface

  • Use a lint roller or brush to remove any lint off the surface of the substrate.
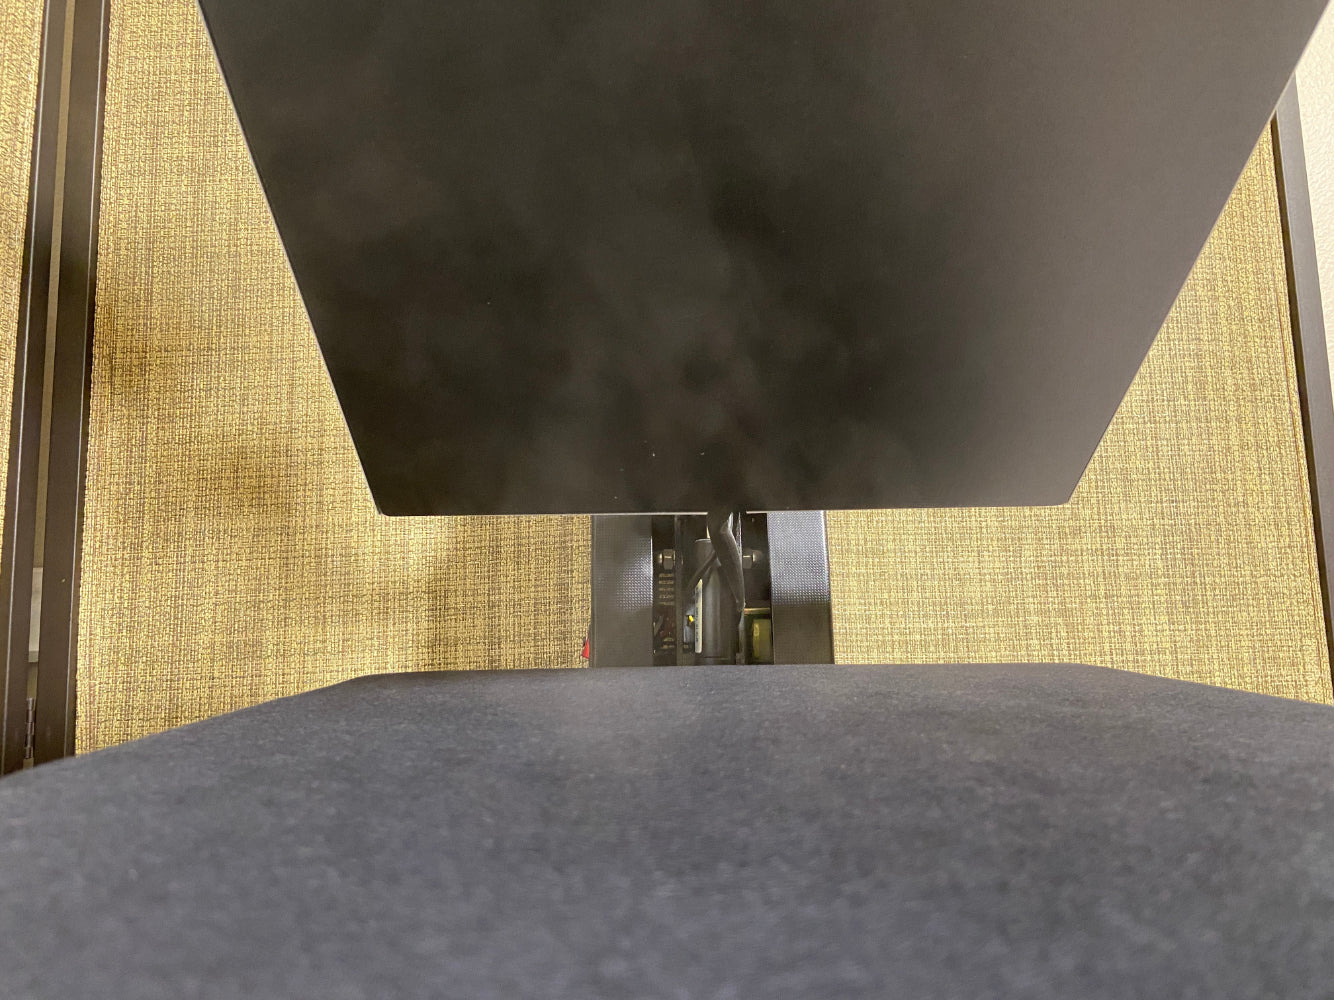
  • Neatly lay out your blank onto your presses platen.
  • Pull the blank outward to make the blank rest flat & even with the platen's surface. The collar should be draped over the backside of the platen to avoid high spots. If there are high spots it is recommended to use a heat press pillow to allow even pressure to the surface. High spots can result in uneven pressure and not well-adhered transfers. This is not ideal.
  • In the process of laying the material out, prevent over-stretching the blank. let material lay naturally rested. This will allow transfer to adhere to the surface properly & reduce transfer shrinkage in the wash.

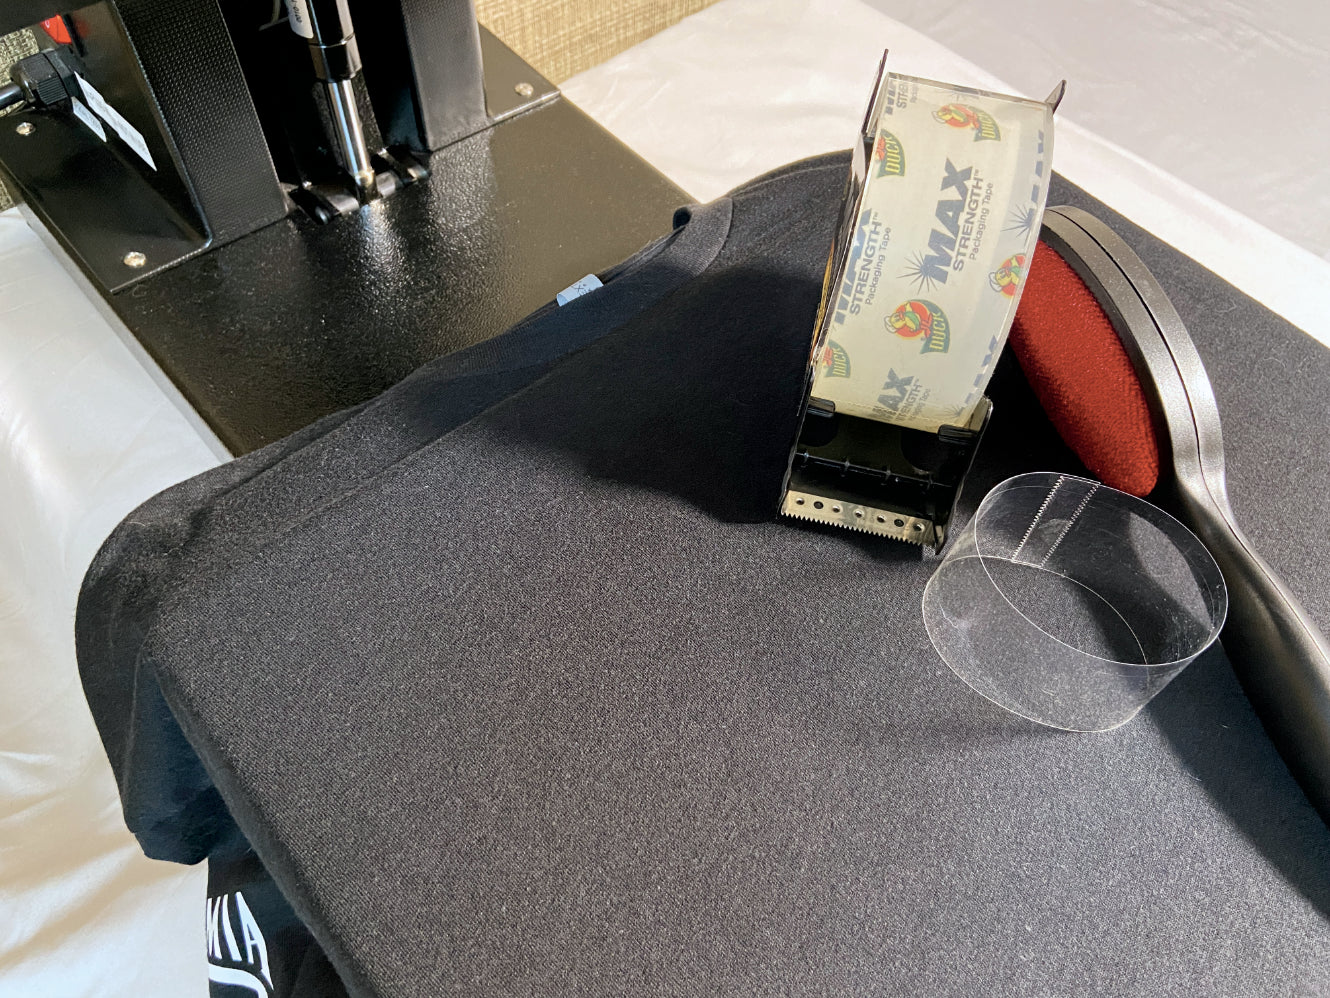
Pro tip: Packing tape turned inside out makes for a good lint removal tool. Blanks should be kept in a clean plastic tote to prevent lint & other contamination.

Step 4: Pre-press blank to remove moisture

When working in humid conditions a pre-press may be required to remove residual moisture from the blank.

  • Once heat press reaches proper temperature press for 3-7 seconds. You might notice steam leaving the blank this is moisture being released. This step allows for proper adhesion to the blank as moisture can keep the transfer from sticking properly.

Note: notice steam coming from garment. No steam should be coming from garment after a pre-press. Increase pressing time to release all moisture from garment depending on your conditions. Allow surface to cool before touching transfer to surface. all moisture should be release before initial press.

Step 5: Initial press

  • Take cut-out transfer and place into alignment of desired location. Double-check to make sure the transfer is placed properly.
  • Close press for proper time and recommended pressure per materials being used.
  • Open the press and let cool for cold peel transfers. Immediately peel for hot peel. Refer to step 6.

Pro tip: Heat tape can be used to secure the transfer to keep it from moving out of place, but isn't always necessary. Usually smaller transfers like chest logos for example might require heat tape.

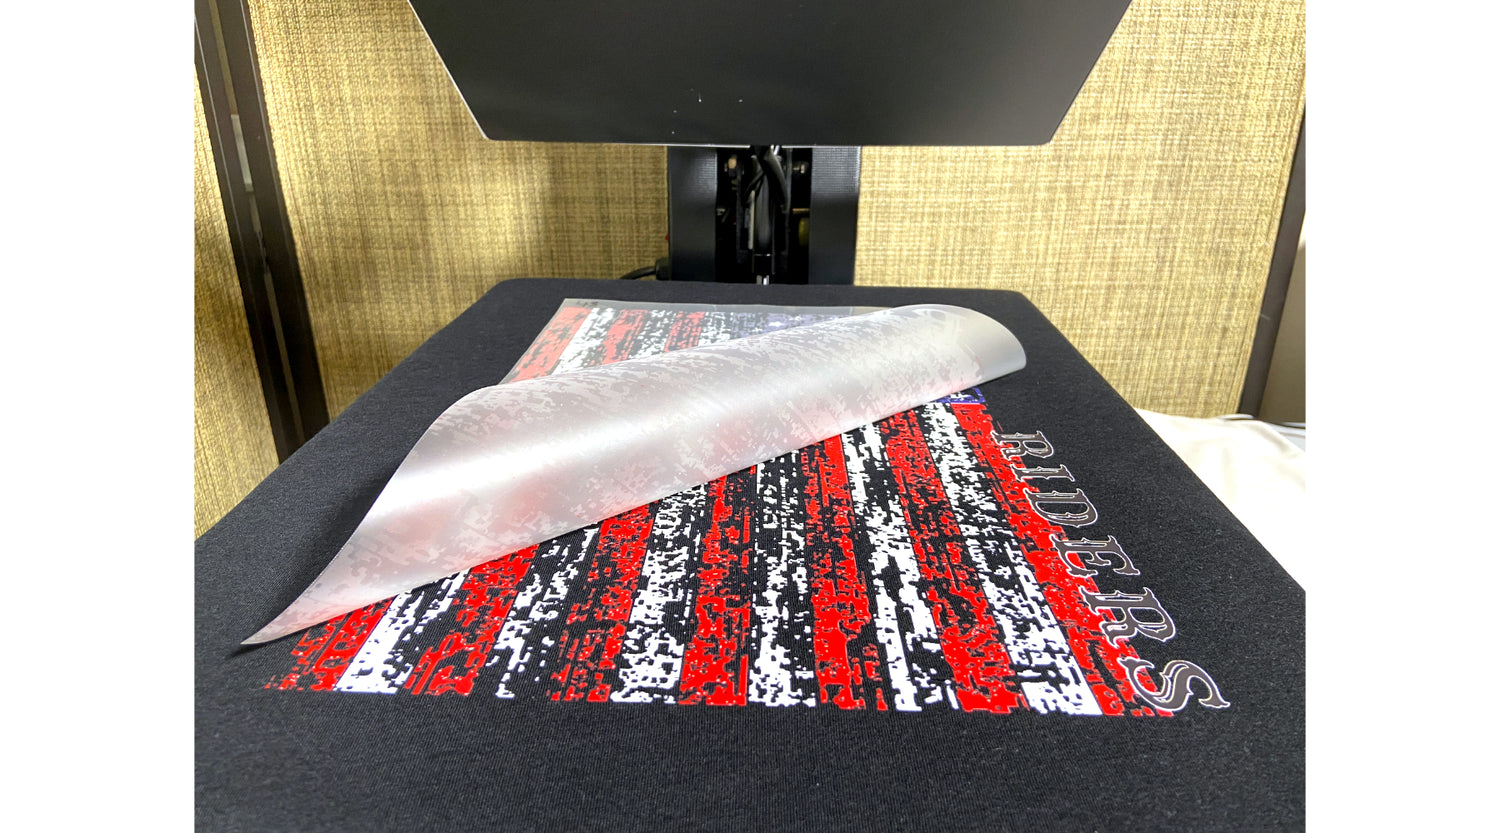
Step 6: Peeling the transfer

Cold & Hot peel

Cold peeling

  1. After the initial press cold peel transfers can not be peeled right away. You must allow it to cool to touch before peeling.
  2. Start by grabbing the corner of the transfer film and proceed to peel back the film once cool.

Hot peeling

  1. After the initial press immediately peel the film for a hot peel film effect. In one quick swift motion grab the corner of the film and peel keeping your hand down flat on the blank. Don't pull up while peeling this could remove the print from a t-shirt. pull flat across the surface swiftly.

Note: Hot peel film can also be left to cool and be peeled like a cold peel film. But a cold peel film cannot be peeled until the surface is cool. If for what ever reason a transfer gives you a hard time peeling or gets stuck.. STOP!. Choose another corner to peel from and continue to peel. Sometimes peeling in a different direction or rubbing the back of the film will allow film to release properly.

Pro tips: Hot peel is not recommended for beginners. Learning the technique of hot peeling can increase the production rate. Hot peel film is meant to be peeled instantly after press opens, immediately while hot. Peel hot peel film keeping hand close to surface with one quick swift motion.

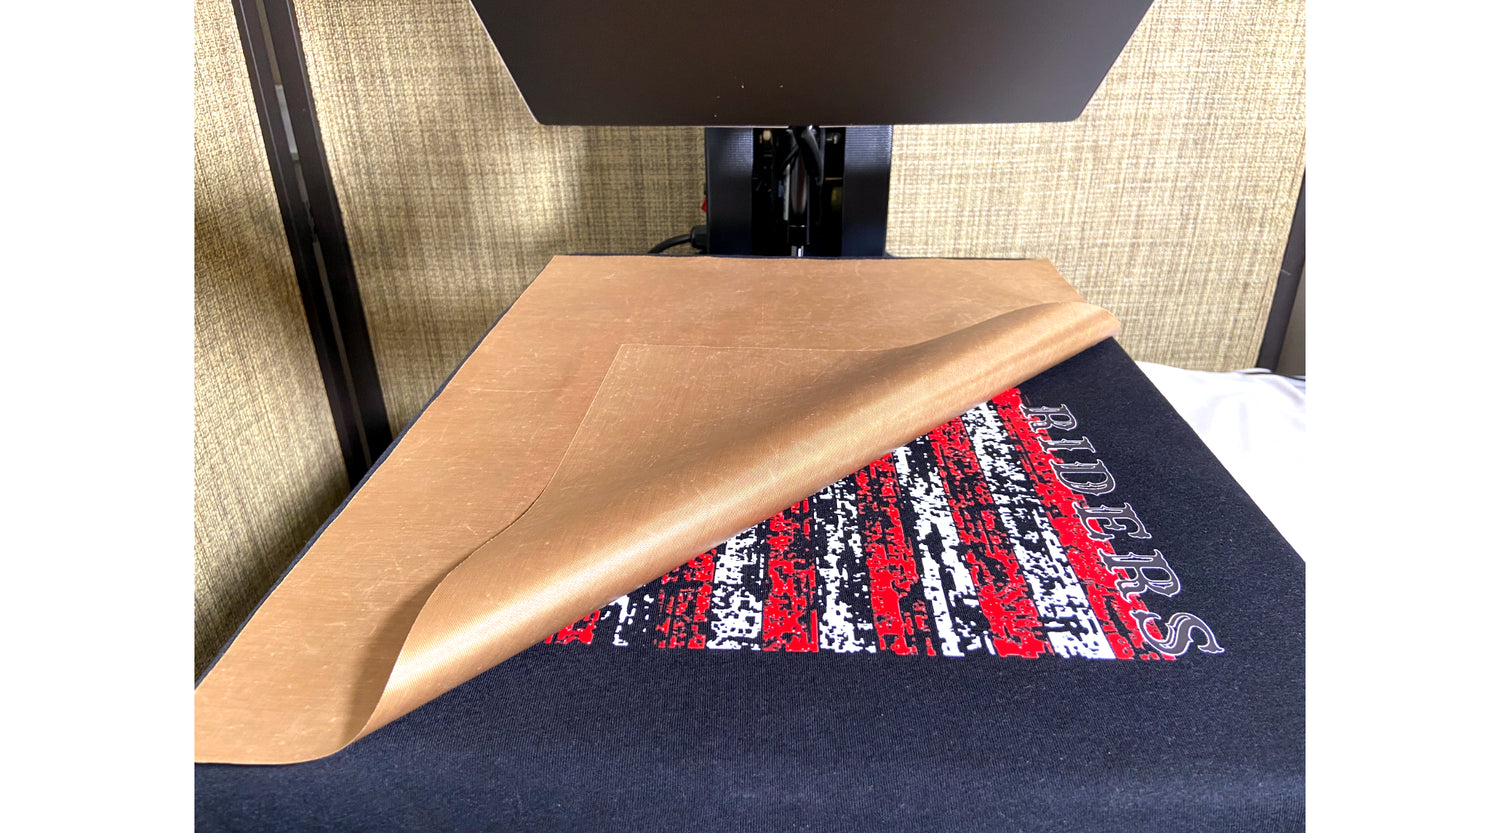
Step 7: Second finishing press

  1. An additional 7 second press should be applied to ensure proper adhesion to the blank.
  2. cover print with finishing sheet before 7 seconds press.

Pro tips: Different types of finishing sheets can be used at this stage to adjust the desired look and feel of the transfer.
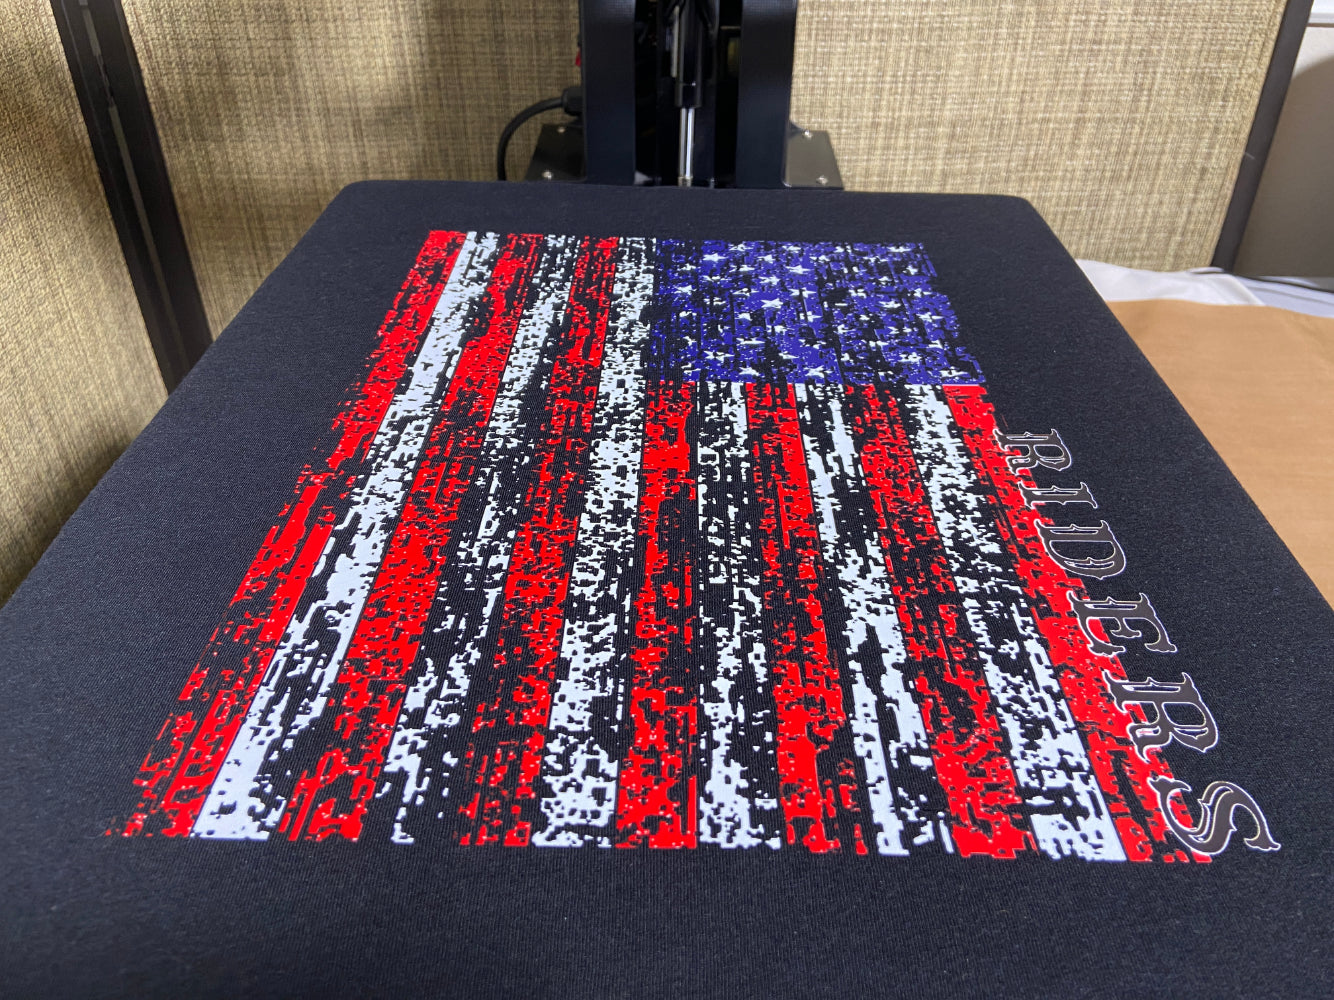
Try these different DTF finishing sheets to get different desired effects.

Examples to try & pro tips:

  • Teflon sheet

will leave a more shiny finish that presses into the fiber of the blank.

  • Brown craft paper

will leave a more of a matte finish

  • T-seal

leaves satin appearance pushes ink deeper into black and leaves a texture that blends with material pressed onto

  • Parchment paper

smooth matte finish

  • blank unused dtf film (use matte side)

will leave a smooth matte finish

Notes: Some types of sheets can be used more than once. while others can not. make sure these sheets are free of defect before each use. Wrinkles in the sheet can show in a final print. This is not desired.

Adjust the pressure as well on the second finishing press to get different desired effects.

Pro-tips on finding proper pressure: Start with light pressure and slowly increase the pressure until you start to see the fabric pattern come through the print. At this point, you can choose to leave the fabric pattern just showing or back it off a bit right before it starts to show. This is the sweet spot!

Final touch

Inspect your work.

DTF transfer storage care guide

Proper storage of Direct-to-Film (DTF) transfers is crucial for maintaining their adhesion, color vibrancy, and overall quality before application. When stored correctly, DTF transfers can last 6 months to 1 year while remaining press-ready. Follow these best practices to ensure longevity:

1. Store in a Controlled Environment

✔ Temperature: Keep transfers at room temperature (around 75°F/24°C) to prevent warping or degradation.
✔ Humidity: Maintain humidity levels between 45% – 50%; lower humidity is preferable to prevent moisture damage.
✔ Avoid Direct Sunlight: Exposure to UV rays can fade colors and weaken adhesive properties.

2. Use Proper Storage Containers

✔ Keep transfers in a sealed, dust-free container to prevent debris accumulation.
✔ Add desiccant packets (such as silica gel) inside the container to absorb excess moisture and maintain optimal humidity levels.

3. Prevent Sticking & Damage

✔ Avoid Overstacking: Excessive weight can cause transfers to stick together, making them difficult to separate.
✔ Store transfers flat with parchment or wax paper between layers to prevent sticking and unwanted pressure marks.

4. Handle with Care

✔ Always handle transfers by the edges to prevent contamination from oils and dirt.
✔ Before pressing, inspect transfers for dust or humidity-related issues. If needed, place them under a flat, heavy surface for a few hours to restore shape.

By following these storage guidelines, your DTF transfers will remain vibrant, press-ready, and in excellent condition for months to come.

TWZ DTF storage guide printout

Washing guide

Washing Instructions:

✔ Turn Garment Inside Out: Reduces direct friction on the design, preventing premature wear.
✔ Use Cold Water: Hot water can weaken the adhesion and cause fading. Stick to cold or cool water.
✔ Gentle Wash Cycle: Select a delicate or low-agitation cycle to minimize stress on the transfer.
✔ Mild Detergent Only: Avoid strong detergents, bleach, or any harsh chemicals that can break down the design.
✔ No Fabric Softeners: Fabric softeners can affect the adhesive bond of the transfer, reducing longevity.

Drying & Ironing Instructions:

✔ Air Dry When Possible: Line drying is recommended to prevent excessive heat exposure.
✔ Tumble Dry on Low: If using a dryer, choose a low-heat setting to avoid damaging the print.
✔ Do Not Iron Directly on Design: If ironing is necessary, place a protective cloth over the print or iron the garment inside out.

Additional Tips for Longevity:

✔ Avoid Dry Cleaning: Chemicals used in dry cleaning can degrade the transfer.
✔ Wash Similar Fabrics Together: Prevents excessive friction from rougher materials.
✔ Do Not Scrub or Stretch Print: This can lead to cracking or peeling over time.

By following these care instructions, your DTF transfers will maintain their vibrancy, durability, and overall quality for the long run.

TWZ DTF washing instructions printout